In the current application era, continuous application availability and zero downtimes are the most tempting things, and if you have a SaaS-based product, it’s very important to keep your infrastructure up and running with healthy services all the time. AWS autoscaling helps people to achieve this, and this is probably the reason that we have seen a number of people using it nowadays. But the biggest challenge in using an autoscaled environment is provisioning scaled infrastructure. In traditional approaches, people used user data (shell script which runs on AWS instance boot) or pre-configured AMI. But the question that comes to mind is - is this really a good solution? While answering this, let's not forget how fast our configurations change and continuously changing DevOps trends.
Currently, Ansible is the simplest way to automate apps, IT infrastructure, and configuration management. Ansible provides a lot of inbuilt modules, from small configurations task to code deployment support.
You may have your configuration/application deployment code ready with Ansible but, when the AWS autoscaling group scales up your application instances, you may wonder - how do we apply this code on that instance? Can the user-data approach be trusted fully? And if something goes wrong, how do we analyze what is wrong? Currently, people love to see things in the browser than boring terminals where you need to grep for exception/problems for debugging failures.
There are several other ways Ansible Tower suggests for the API-based approach:
- An instance launch in an autoscaling group is triggered (due to ASG creation, event notification, parameter change, etc.)
- When the instance boots, it executes a script that makes an authenticated request to the Tower server, asking the node to be put into a queue for configuration.
- Ansible Tower kicks off a job that configures the server.
This approach lets Ansible tower UI analyze what’s going on with configuration, but it also means updating your auto-scaling launch configuration, which I don't think is a good way to configure your infrastructure. For any scalable environment, there should not be any dependency on one component while we build an infrastructure. To tackle all of these issues, I have a simple solution that involves using open-source AWX (upstream project for Ansible tower).
Ansible Tower is a licensed product offered by Red Hat, but the code that builds Ansible Tower releases is open-sourced and is available in the AWX Project. According to the AWX Project FAQ, the best way to explain this open source model is in the analogy, “what Fedora is to Red Hat Enterprise Linux, AWX is to Ansible Tower.”
Along with this, we have built one custom solution as a tower-sync autoscaling lifecycle watcher, which helps to integrate AWS autoscaling with Ansible AWX to trigger jobs without touching your existing autoscaling group launch configuration or user data scripts. So, how does it work? I will explain further in this blog.
Steps to configure Ansible-AWX with tower-sync utility.
I am more of a Docker guy, and building solutions using Docker helps me to keep consistency across my work environments, and it’s easy to share across my team. I have configured and built all AWX container images and tower-sync utility images, which you can find on Docker Hub under my repository:
https://hub.docker.com/r/sachinpgade/tower_sync/
https://hub.docker.com/r/sachinpgade/awx_worker/
https://hub.docker.com/r/sachinpgade/awx_web/
I have configured the docker-compose file to make it easy to launch the whole stack as a microservice. Docker Compose is a tool for defining and running complex applications with Docker. With Compose, you can define a multi-container application in a single file, then spin up your application in a single command which does everything that needs to be done to get it running. (https://docs.docker.com/compose/).
Before you start:
Run the below commands to start your Ansible-AWX stack with the tower-sync autoscaling lifecycle watcher utility:
$ mkdir awx && cd awx

$ curl -O https://raw.githubusercontent.com/sachingade20/aws_asg_provisioner_with_ansible_awx/master/docker-compose.yml
Before starting AWX stack let’s discuss a scenario where I am going to use this stack.
Here is a scenario where we need to deploy my application stack in AWS, which consists of the following:
- Django as application server (Using AWS Autoscaling)
- MySQL as a database server (Using AWS RDS/EC2)
- Nginx as a web server (Using AWS Autoscaling)
In a general SaaS-based application scenario, everyone wants their application stack to be up and running all the time and to scale up and down on the basis of the amount of application workload using AWS Autoscaling.
At this point, we have 2 autoscaling groups created and one RDS instance created.
aws autoscaling  update-auto-scaling-group      --auto-scaling-group-name django-application-poc      --min-size 1      --max-size 3      --desired-capacity 1

aws autoscaling  update-auto-scaling-group      --auto-scaling-group-name nginx-application-poc      --min-size 1      --max-size 3      --desired-capacity 1
Note: It's very important to have two tags in the launch configuration, viz., Role and Environment.
Role: This is an identifier later used by Ansible Tower to identify which templates to run.
Environment: This is required to identify which kind of environment we are running, e.g., poc, staging or production, etc.
To configure my Django application server and Nginx Web application server, I have my ansible project/playbooks written:
Ansible Project:
- roles

    - deploy_service

    - django

    - nginx

    - datadog

    - newrelic

    - mysql

- Application.yml (playbook for application/django server)

- Web.yml (playbook for web/nginx server))
Running Ansible playbooks application.yml and web.yml configures my application and web server, respectively. But now, with my autoscaling group scale-up activity to run this playbook, we need to pollute AWS autoscaling launch configuration to run this using userdata and in that scenario, I don’t have any control over or an easy debugging way to look out for any failure.
To solve this problem, we have created the Tower-Sync utility, which triggers this playbook using notifications generated by AWS auto-scaling.
Let’s Understand how it works.
AWS Autoscaling groups now support Lifecycle hooks. Auto Scaling lifecycle hooks enable you to perform custom actions by pausing instances as Autoscaling launches or terminate them. For example, while your newly launched instance is paused, you can install or configure software on it [AWS Autoscaling Lifecycle Hooks].
So with this feature, we can configure AWS autoscaling groups to have create_host and delete_host lifecycle hooks, which generate notifications on Scale-up and Scale-down scenarios.
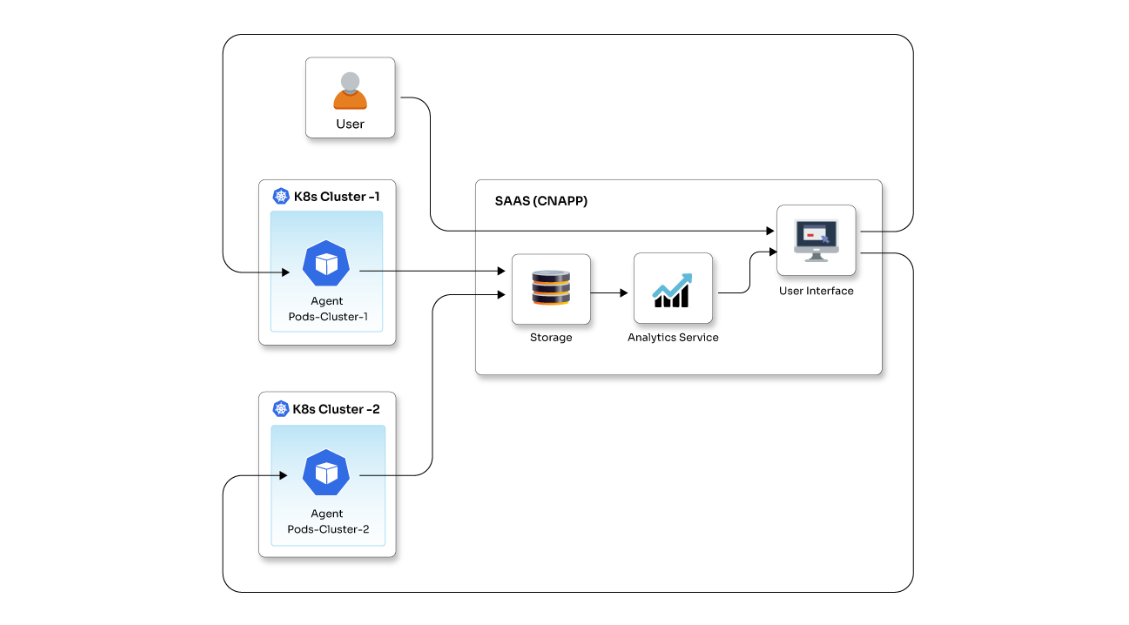
But now, the question is how can we monitor these notifications or where is the communication point to receive these notifications? That’s where AWS SQS comes into the Picture. To get a clear idea of how it works, let’s take a look at this architecture:

Let’s set up AWS SQS and Lifecycle hooks for our autoscaling groups.
Create SQS Queue:
$:aws sqs create-queue --queue-name aws-asg-tower-sync
Output:$ { "QueueUrl": "https://queue.amazonaws.com/XXXXXXXXXX/aws-asg-tower-sync"}
The output will be a queue URL after it is created, but we need to identify the queue as an AWS ARN format of:
arn:aws:sqs::<12-digit-AWS-account>:
Use this to get the ARN of the queue you just created:
aws sqs get-queue-attributes --attribute-names QueueArn --queue-url
$ aws sqs get-queue-attributes --attribute-names QueueArn --queue-url https://queue.amazonaws.com/XXXXXXX/aws-asg-tower-sync
Output$: {"Attributes": {"QueueArn": "arn:aws:sqs:us-east-1:XXXXXXXX:aws-asg-tower-sync"}}
Note down this ARN which we will need further to update configurations for ASG group and Ansible Tower configurations.
SQS_ARN=arn:aws:sqs:us-east-1:XXXXXXXX:aws-asg-tower-sync
Setup IAM Role to enable Autoscaling Notifications access to SQS:
It’s very easy to set up IAM Role using the AWS console. Log into the AWS console and create an IAM role with the existing Autoscaling Notification Access Policy. Copy the newly created Role ARN which will look like this:
IAM_ARN=arn:aws:iam::XXXXXXX:role/aws-asg-tower-sync

Update autoscaling groups with lifecycle hooks:
1. aws autoscaling put-lifecycle-hook<br>
   --auto-scaling-group-name  django-application-poc   --notification-target-arn $SQS_ARN<br>
   --role-arn $IAM_ARN   --lifecycle-hook-name NewHost  --lifecycle-transition autoscaling:EC2_INSTANCE_LAUNCHING
2. aws autoscaling put-lifecycle-hook<br>--auto-scaling-group-name django-application-poc --notification-target-arn $SQS_ARN --role-arn $IAM_ARN --lifecycle-hook-name RemoveHost --lifecycle-transition autoscaling:EC2_INSTANCE_TERMINATING
3. aws autoscaling put-lifecycle-hook<br>--auto-scaling-group-name nginx-application-poc --notification-target-arn $SQS_ARN --role-arn $IAM_ARN --lifecycle-hook-name NewHost --lifecycle-transition autoscaling:EC2_INSTANCE_LAUNCHING
4. aws autoscaling put-lifecycle-hook<br>--auto-scaling-group-name nginx-application-poc --notification-target-arn $SQS_ARN --role-arn $IAM_ARN --lifecycle-hook-name RemoveHost --lifecycle-transition autoscaling:EC2_INSTANCE_TERMINATING
Now we are ready with Configurations that we need to update docker-compose file to launch stack.
Note: You can download the Dockerfile mentioned in the previous part of the blog.
In the docker-compose file, most of the parameters are easy to understand, and we can keep them as it is. The only thing we need to update is tower-sync autoscaling lifecycle watcher with the following Environment variable.
AWS_SQS_QUEUE_NAME: "aws-asg-tower-sync"

AWS_REGION: us-east-1

AWS_SECRET_ACCESS_KEY: "XXXXXX"

AWS_ACCESS_KEY_ID: "XXXXXXX"
Start AWX stack using Docker Compose:
Now configure valid AWS Keys and the SQS Queue name we created, and we are good to launch our AWX Stack using the following commands:
$ cd awx

$ docker-compose up -d
This will take some time, and once your CPU calms down, access: http://0.0.0.0/ and enter username, admin and password password.

Set up Ansible Tower with Your Ansible Project and templates.
Once Ansible AWX(Tower) is up and running first few things that we need to configure are:
Set Up Credentials:
- AWS Credentials to sync with AWS Instances
- GitHub/Bitbucket credentials to sync with our Ansible repos
- AWS Private Key File to connect to Instances.
In the Menu section on the left, you can find the new credentials section where we can add new credentials, as shown in the image.

Setup Ansible Project:
- Ansible Tower needs to add templates/job to run playbooks. For that, we need to add our Ansible project repository in Ansible Tower.
- Just like Credentials, go to the Projects menu on the left side.
- Add new project.
- Fill required information to configure your project (Note here we are required to select credentials configured in the first step to add the project).

Setup Templates:
- Lastly, add a template which is nothing but adding playbook as a template so that whenever you want to start/configure any instance, you are only required to run this template as a job.
- Just like Projects and Credentials, create a new template using the left bar Menu and add a new template.
- Add a new template for the application and web server using the right playbooks.
- Make sure we add one template for each Role we have in our deployment stack, i.e., application, web, and database.
- Tower-sync utility triggers the template on the basis of Role tag configured in an instance.
- Make sure you tick the prompt on-launch checkbox for Inventory and extra variables section while creating Template. The reason behind this is when the tower-sync utility triggers the job, it will run this template for dynamic inventory created for the AWS ASG group, and it will send some extra variables as a part of the trigger to identify which environment it’s running and which service it's deploying.

Now, your Ansible AWX and autoscaling groups are ready. Just verify if this is working as expected by scaling up your ASG group using the command:
aws autoscaling update-auto-scaling-group --auto-scaling-group-name django-application-poc --min-size 1 --max-size 3 --desired-capacity 2
- This will create a new instance in the ASG group, which sends notifications to AWS SQS.
- The tower-sync utility continuously polls SQS for new Messages.
- The tower-sync utility receives a new host notification.
- As a part of that Tower-sync utility, look for Tags: Role and Environment, i.e., Role: application and Environment: poc in the case of the above Django server.
- This utility will create new inventory naming -
- It will trigger a template with the name of against this inventory.
- Once the Job is done, Tower sends the various type of notifications, i.e., Hipchat, Slack, or email if you configure it using left menu bar tab Notifications.
At the end of this, we will have a completely automated system that can take care of your AWS autoscaling group configuration and deployment. You can use this to update your existing autoscaling groups as well without touching user data. In my next blog I will be talking about "What more can you do with Ansible AWX?" Stay Tuned!


