


Posted By

Struggling with messy code and endless bugs? SonarQube is the solution you need. Poorly written code can lead to bugs, security vulnerabilities, and maintenance nightmares down the line. To ensure that your codebase remains robust and reliable, tools like SonarQube come to the rescue. This post explains how it's powerful analysis and reporting can help you write cleaner, more secure, and more maintainable code, transforming your development process for the better.
Note: This serves as a continuation of the previous blog: Ensured code quality excellence with SonarQube
SonarQube analysis reporting details
Let's take a closer look at the key components of SonarQube's analysis reporting and why is it so loved by developers:
1. Dashboard overview
SonarQube offers a user-friendly dashboard that presents a concise snapshot of the project's status. It presents key metrics, including issue counts, code quality concerns, bug reports, security vulnerabilities, and code coverage statistics. This dashboard serves as a valuable tool for swiftly evaluating the overall condition of your codebase.
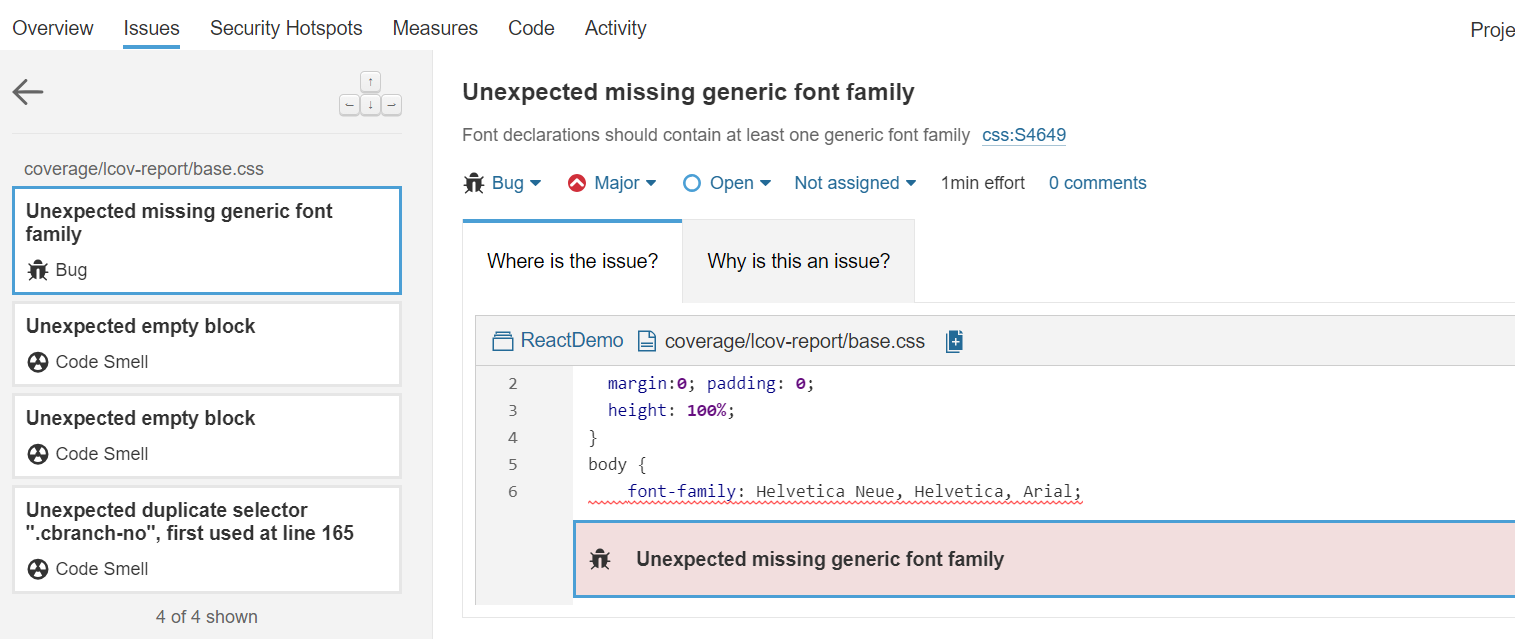
2. Delve deeper into problems
SonarQube classifies issues based on their severity (e.g., "Blocker," "Critical," "Major") and type (e.g., "Code Smell," "Bug," "Vulnerability"). Users can delve deeper into each category to gain insight into individual issues, their exact code locations, and recommended solutions. This streamlined approach facilitates the prioritization and resolution of the most pressing concerns as a top priority.
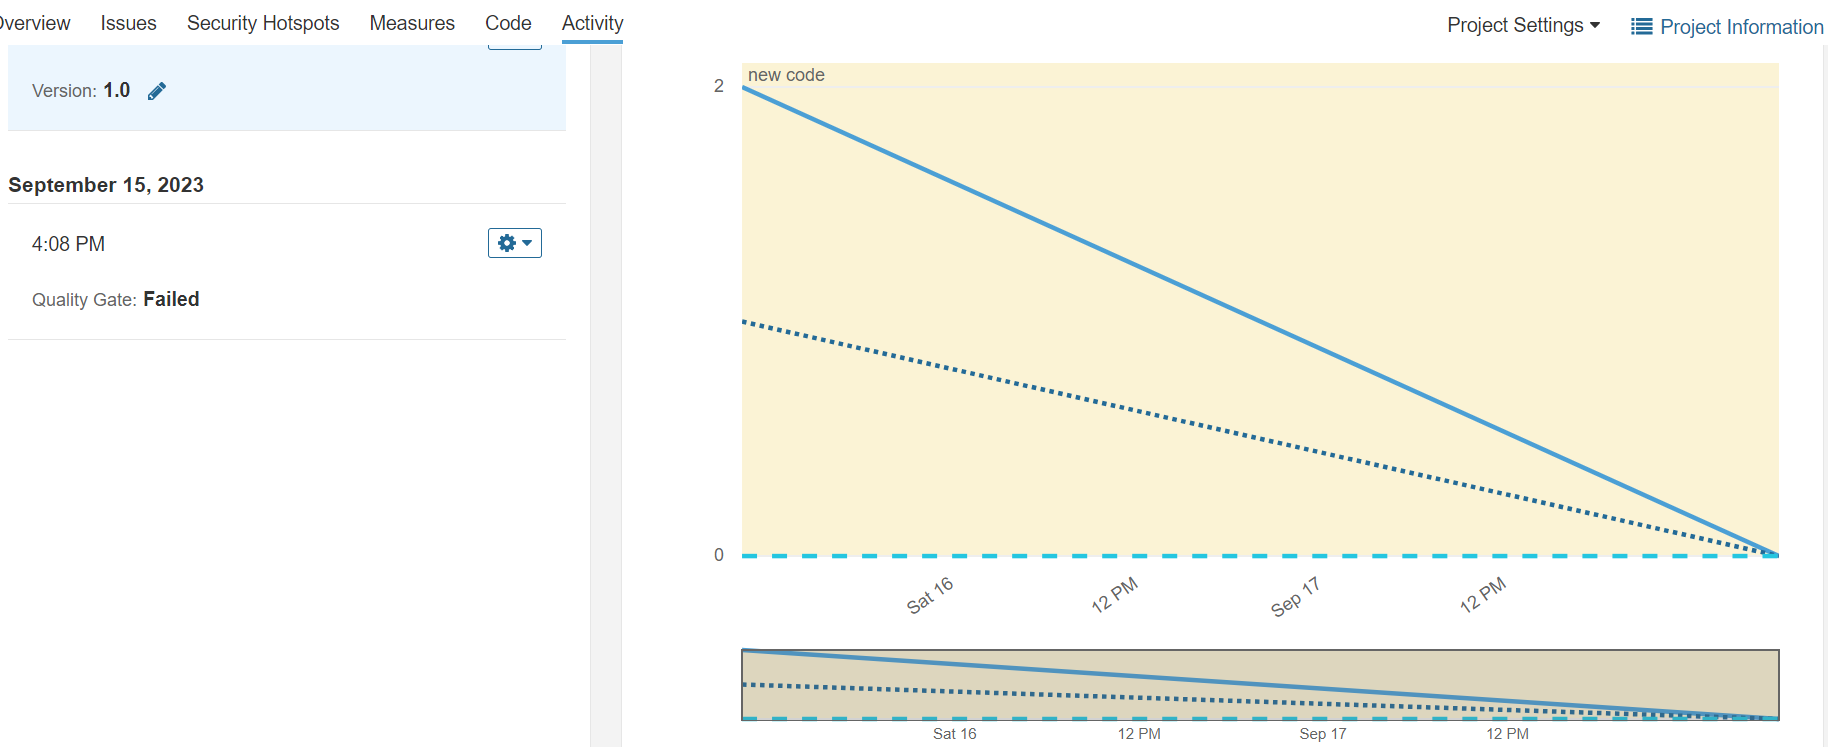
3. Historical data
SonarQube tracks projects related to historical data, allowing devs to monitor code quality trends over time. Developers can see whether the code quality is improving or deteriorating and take proactive measures accordingly. Users can check various measures under the “Activity tab”.
4. Custom rules and quality profiles
SonarQube allows the defining of custom rules and quality profiles tailored to project-specific requirements. Organizations can enforce coding standards, security policies, and best practices that are unique to the organization. To craft a personalized profile, navigate to the Quality Profile tab and initiate the creation process by clicking "Create."

5. Code duplication detection
Identifying and eliminating duplicated code can lead to significant improvements in code maintainability. SonarQube can detect code duplication across the codebase and help in refactoring it for better readability and efficiency.
A closer look at SonarQube's analysis reporting
Now let’s look at the details of SonarQube's analysis reporting to gain a deeper understanding of the valuable insights it provides for maintaining high-quality code. SonarQube's comprehensive reporting offers a user-friendly and informative dashboard that can help teams make informed decisions and take targeted actions to improve the codebase. Here’s how.
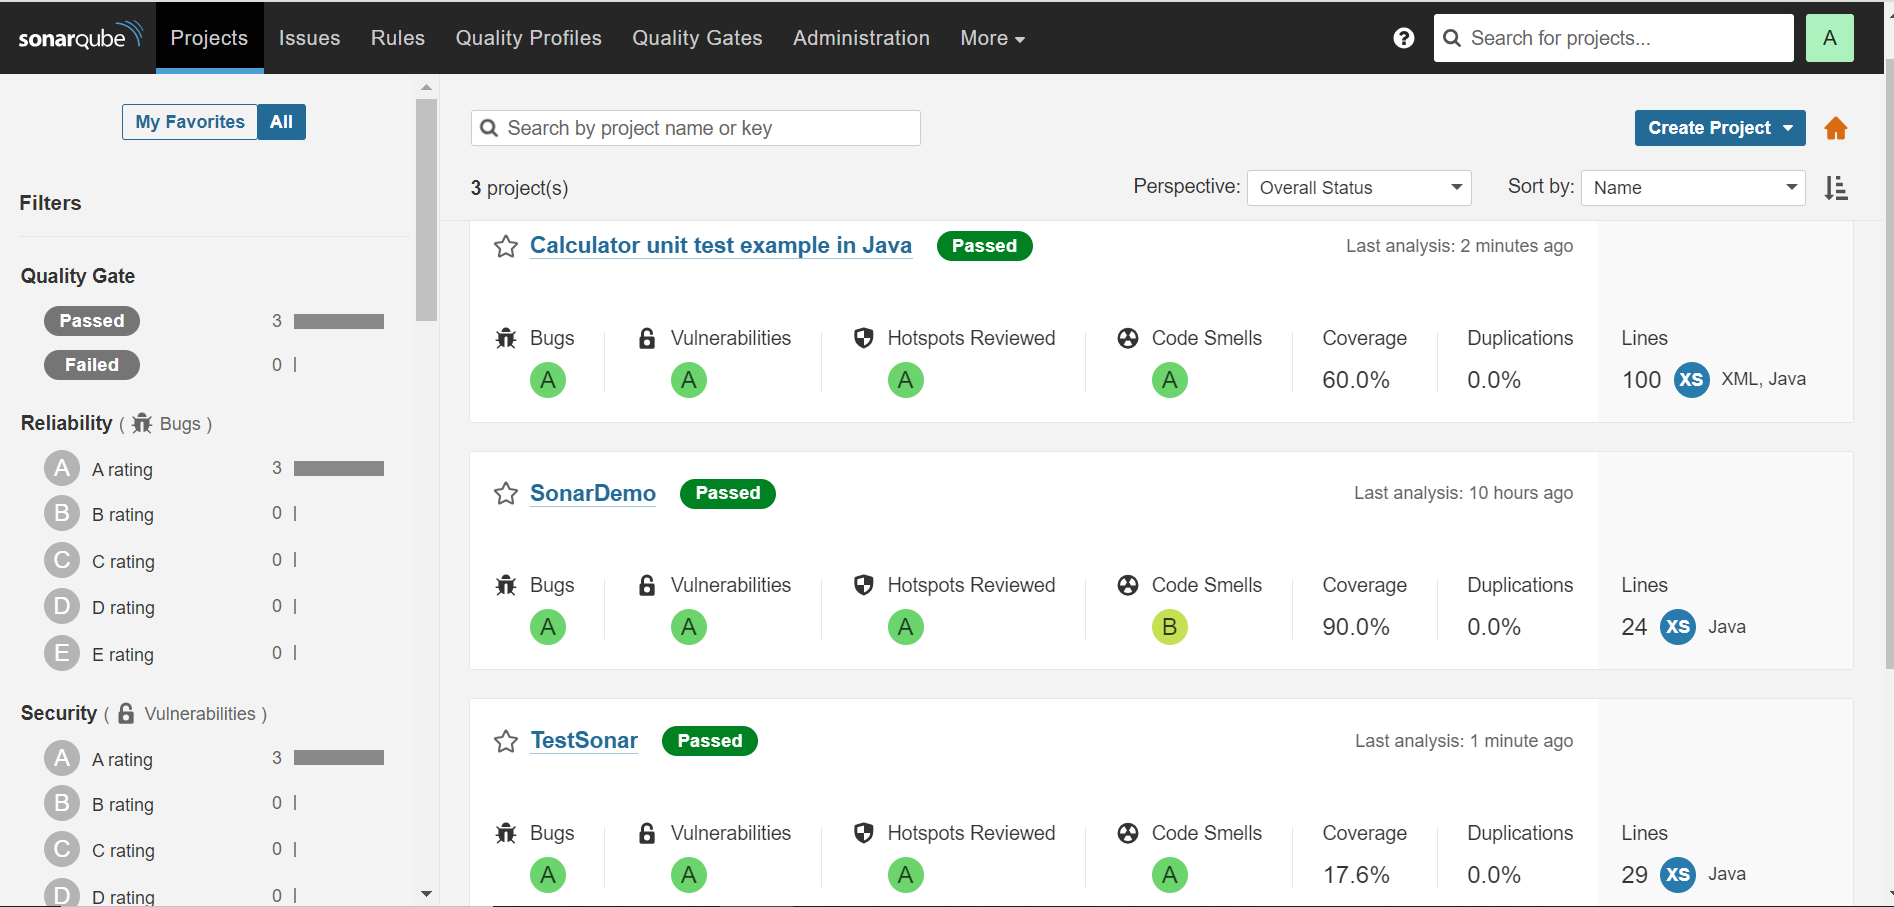
Explore the dashboard:
The project's overview page displays various metrics and information about the project's code quality. This is the SonarQube dashboard for the selected project.
- Metrics and statistics: The dashboard provides various metrics such as the overall code quality rating, the number of issues, code smells, bugs, vulnerabilities, and code coverage. You can view these metrics to get an overview of your project's health.
- Issues and violations: The dashboard may display issues and violations categorized by severity (e.g., "Blocker," "Critical," "Major") and type (e.g., "Code Smell," "Bug," "Vulnerability"). You can click on these categories to see more details.
- Navigate to detailed reports: To access more detailed reports, click on the specific sections or links on the dashboard. For example:
- Click the "Issues" section to see a list of all the issues in your project.
- Click the "Code Smells," "Bugs," or "Vulnerabilities" sections to see details about those specific types of issues.
- Click the "Coverage" section to view code coverage reports if code coverage analysis has been integrated.
- Click the “Code” section to examine individual file-level details for bugs, issues, vulnerabilities, and coverage.
This dashboard serves as a central hub for monitoring and managing the quality of your software projects. It offers a quick and intuitive way to assess the health of your codebase and act where necessary.

SonarQube report generation steps
Reports can either be generated manually via the dashboard or via the CNES plugin. Let’s look at the detailed steps of generating SonarQube reports via each method.
Method 1: Manually via dashboard
To generate a report manually, follow these steps:
- Access the SonarQube dashboard: Open a web browser and navigate to the SonarQube server's URL. Log in with your credentials to access the SonarQube dashboard.
- Select the project: On the SonarQube dashboard, locate and select the project for which you want to view the generated report. Click on the project name to enter its project dashboard.
- Select overview: On the project dashboard, you'll see an overview of the project's code quality and analysis results. This includes various metrics and charts that summarize the code quality status.
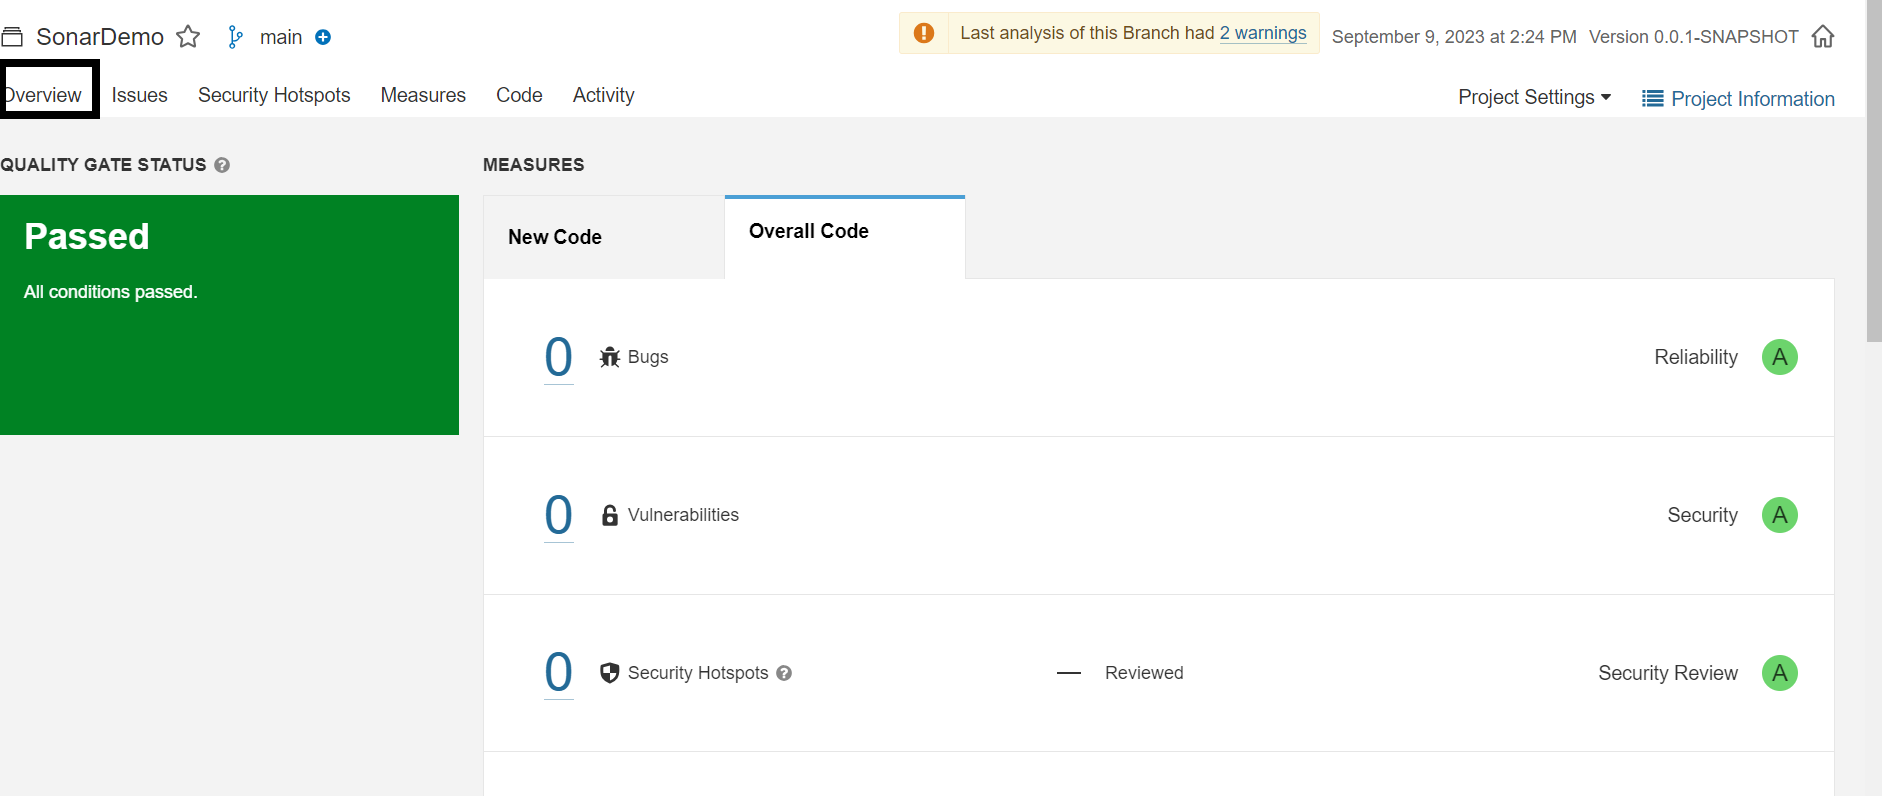
To view more detailed metrics and the generated report, navigate to the "Measures" tab. This tab provides comprehensive information about the project's code quality.
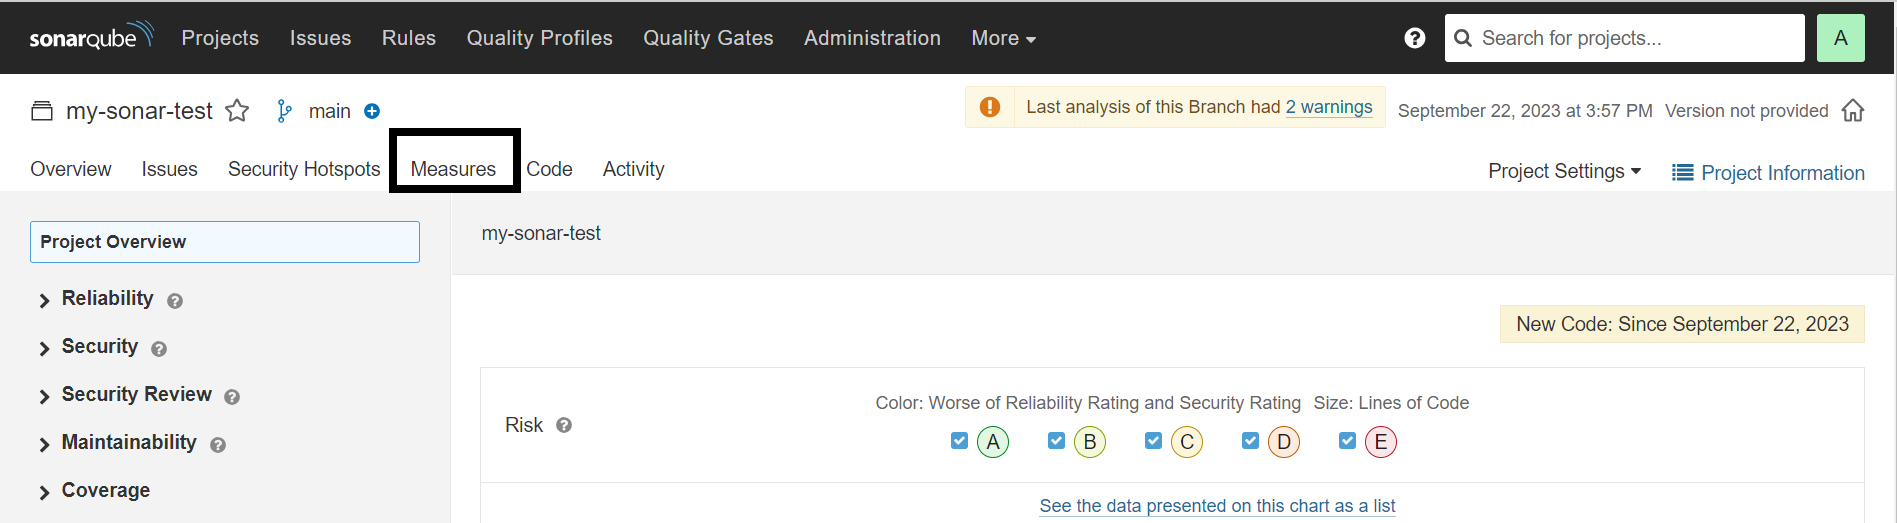
- Select the metrics of interest: Under the "Measures" tab, select specific metrics that needs to be viewed. Common metrics include reliability, security, maintainability code coverage, code duplication, security vulnerabilities, and more. Click on the metric to see detailed information.
Exploring the detailed report
Depending on the metric selected, a detailed report will be generated. The report typically includes data visualization, graphs, and tables that provide insights into the code quality. Use filters to sort the data and focus on specific aspects or issues.
- You will be able to see a green circle on the graph which shows the overview of your coverage and analysis.
- Click on the circle and a new window will open with the project’s code.
- Go to more options (≡) on the right and select show measures.

- A new window will open that shows all the file measures in a single window.
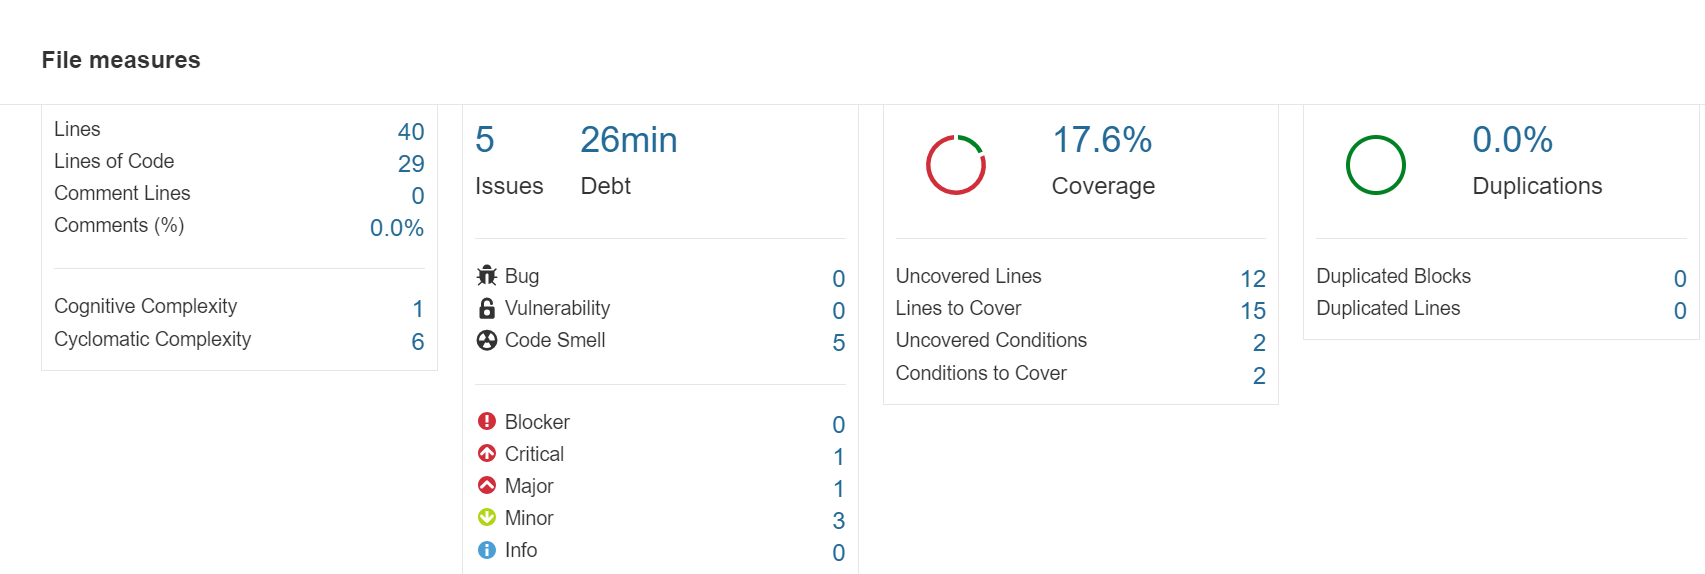
- Select ‘show all measures’ to check the entire analysis in detail.

Method 2: CNES plugin
I recommend utilizing the CNES Plugin for report generation because it facilitates the download of a comprehensive set of project reports in various formats. For optimal compatibility, it's advisable to use SonarQube LTS version in conjunction with the CNES Plugin. Before deploying the plugin, ensure your SonarQube edition is compatible with it. For reference and further information, visit the following GitHub link: CNES Plugin GitHub Repository
Download and install the CNES plugin:
To generate reports using the CNES Plugin, follow these steps:
• Download the CNES Plugin
• Stop your SonarQube server before proceeding further.
• Once the plugin is downloaded, navigate to your SonarQube installation directory.
• Open the "extensions" folder, and then go into the "plugins" subfolder.
• Paste the downloaded JAR file into this directory.
• Example: C:\SonarQube\Sonarqube Versions\sonarqube-9.9.1.69595\extensions\plugins
• Restart the SonarQube server.
Access CNES report:
- After logging in, a new option labeled "More" will be displayed on the dashboard. Click on "More" and select "CNES Report" from the dropdown menu.
- A new window will open with the option to generate a report. Select the project for which you want to generate a report and hit ‘Generate.
After clicking "Generate," the report will be downloaded and will be ready for extraction.
This is how to download, install, and access the CNES plugin for generating reports in SonarQube.
Embrace SonarQube for code quality transformation
SonarQube Analysis Reporting goes beyond flagging code problems; it empowers you to enhance your codebase. This tool offers practical insights, promotes teamwork among developers, and guarantees top-notch software. Mastering SonarQube Analysis Reporting elevates your coding to create software marked by excellence, reliability, and easy maintenance. Embrace SonarQube and watch your code quality shine.


Related Blogs